How to Shoot Great Photos in Big Bear Lake: Part 2
Posted: 03/07/25 | By Brady Enger
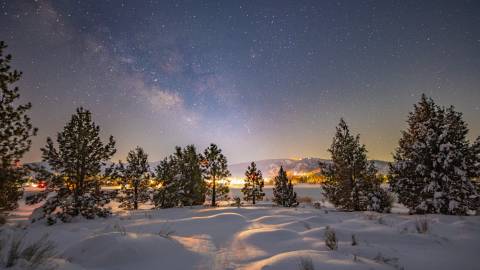
Capturing the Night Sky Over Big Bear Valley
Hi again! Brady Enger here - owner and operator of Bending Energy Photography. Today's topic is all about photographing the night sky, a beautiful yet underappreciated landscape in our valley. Here I offer you my Top 4 tips for capturing a stunning night skyscape and highlight Big Bear's push to conserve our sky. Happy Shooting!
1. Time Your Shoot
Rather than marching out the door - although you're free to do so - I use an app called PhotoPills to determine the timing of my shot. The app details the positions of astronomical features like the Milky Way, the sun, and the moon for optimal photo taking. New Moon nights are preferrable for night sky photography as the moon does not rise, preventing it from brightening the skies and dimming the stars.
2. Scout Your Perch
Whether you're thinking of shooting lakeside, from your home, or from the trails, plan ahead and know how to get where you want to go. Scout your location during the day to ensure you can drive safely - or hike - to your chosen post after dark. I usually shoot my night photography on the East end of the Big Bear Valley or on the North Shore as those areas tend to be the darkest.
All photos owned by BEP and subject to copywrite laws.
3. Choosing Your Equipment
While having a professional grade mirrorless or DSLR camera allows more control of your photograph, you can still get incredible photos with your smartphone. Whatever you're using, you must have your camera or phone steady. A tripod - of course - is ideal, however I have employed more natural equipment like a sturdy rock - or even a picnic table; whatever works and won’t damage the equipment. If you're shooting from your phone, use the night mode or manual mode if you can.
4. Adjust Your Settings
Next, you'll need to adjust the shutter speed to approximately 20 seconds. This means the camera will take 20 seconds to take the photo. In that 20 seconds, the camera is gathering as much light as possible so be sure not to move it!
Also, set your aperture, or F-Stop, to 2.8 or as low as possible. The F-Stop setting controls the amount of light coming through the camera lens. A lower F-Stop means more light is coming in - what you need for night photography to allow the stars and celestial phenomena to show up in the photo.
Set the ISO - the camera sensor's light sensitivity setting - to approximately 1600 to help ensure the right exposure for your sky shot.
The ISO, F-Stop, and shutter speed work together to produce the right amount of light for your picture. So, you may need to experiment a little to find the right mix.
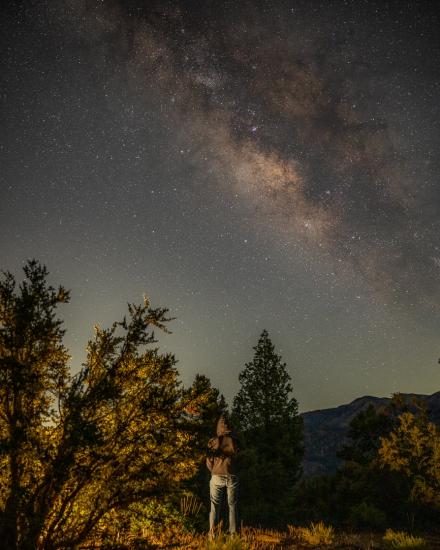
Being a Southern California destination, Big Bear is surrounded by ever expanding cities, and our valley suffers more and more from light pollution that inhibits our ability to see and enjoy the night sky. Brady Enger
5. Help Us Protect Our Night Sky
Many don’t realize how much exterior and landscape lighting hinders our view of the stars, planets and galaxies. Learn about Care For Big Bear's push to Save Our Skies here in Big Bear and how you can help preserve this unique asset.
Night sky photography and stargazing are great ways to preserve our dark sky as they help us understand their vulnerability, the impact lighting can have, and encourages us to be mindful energy users. Get started on Stargazing with free guide apps like Sky Tonight and start learning about this underappreciated wonder!
---
Brady Enger is the owner of Bending Energy Photography which offers professional photo and video services for real estate, portraits, advertisements, products, and promotional videos. Follow this talented artist on Facebook and Instagram, and learn more at BendingEnergy.com.
Related Partners